24 Januari 2012

Memasukan menu help di VB.NET


Jangan berfikir kalau semua orang itu pasti dapat memakai dengan mudah program yang kamu buat . Karena tidak  semua user adalah orang yang sudah familiar dengan program2 semacam itu. Oleh karena itu penting untuk menyertakan manual book dan / menu help yang membahas cara langkah demi langkah menggunakan program(aplikasi) kamu secara maksimal.
Umumnya  menu help yang kita temui berupa file dengan ekstensi *.CHM tapi ada pula yang menggunakan *.pdf , *.doc ataupun *.html. Tujuannya sama yaitu memberi bantuan arahan/petunjuk/pedoman pemakaian program/aplikasi kepada user.
Kamu bisa membuat file *.CHM  contoh seperti :


Dengan menggunakan HelpNdoc versi gratisnya bisa di download DISINI*situs resmi cukup mudah penggunaanya.
Install kemudian buat lah menu help kemudian compile dengan pilih Tools >  Compile Project, piih tipe output yang ingin dihasilkan klik generate. Selesai tinggal link kan ke project program kamu.

 Untuk Link ke VB.NET :
Masukan file yang telah kamu buat sebagai file help ke folder Bin di project’a.
Buka project kamu pilih komponen yang jika kamu beri event akan memanggil file help
Gunakan Source code :

System.Windows.Forms.Help.ShowHelp(Me"NamaFileHelp.chm",HelpNavigator.AssociateIndex)

// *.chm bisa diganti tergantung file yang kamu bikin

Untuk Link ke C#:
Gunakan source code

System.Diagnostics.Process.Start("MANUAL BOOK.pdf");


17 Januari 2012

Mempermudah ADO.NET

Apakah Anda sering dibuat pusing bahkan repot dengan ADO.NET ? Mungkin yang baru mengenal tentang Database akan menjawab 'Ya', karena dipusingkan dengan istilah-istilah seperti 'DataAdapter, 'DataTable', 'DataRow, dll. Apalagi yang sudah pernah mengerjakan sebuah Aplikasi kompleks, yang kebanyakan akan mendeklarasikan beberpa variabel di tiap prosedurnya. Sebenarnya hanya dengan menambahkan sebuah Module, penggunaan ADO.NET dapat dipermudah, bahkan bisa lebih mudah dari ADO klasik yang biasa dikenal dalam VB 6.0 .

Buat sebuah Module dan ketikkan :

Public Function ConString() As String
ConString = ("Provider=Microsoft.Jet.OLEDB.4.0;" & _
"Data Source=D:/KTP.mdb")
End Function

Public Function SQLTable(ByVal Source As String) As DataTable
Try
Dim Adp As New OleDb.OleDbDataAdapter(Source, ConString)
Dim DT As New DataTable

Adp.Fill(DT)
SQLTable = DT
Catch ex As OleDb.OleDbException
MsgBox(ex.Message)
SQLTable = Nothing
End Try
End Function

Public Function ExecSQL(ByVal SQLCommand As String) As Boolean
Dim Con As New OleDb.OleDbConnection
Dim Cmd As New OleDb.OleDbCommand

Try
Con.ConnectionString = ConString()
Con.Open()

Cmd.CommandText = SQLCommand
Cmd.Connection = Con
Cmd.ExecuteNonQuery()

Con.Close()

ExecSQL = True
Catch ex As OleDb.OleDbException
MsgBox(ex.Message)
ExecSQL = False
If Con.State = ConnectionState.Open Then Con.Close()
End Try
End Function


Dapat dilihat Module tersebut memiliki 3 fungsi, antara lain :
  1. Fungsi 'ConString', fungsi ini menentukan ConnectionString dari Database. Pastikan fungsi ini bernilai benar, karena fungsi ini menetukan kedua fungsi lainnya. Dari contoh diatas dapat dilihat bahwa Database-nya bertipe MS Access 2003 yang berlokasi di 'D:/KTP.mdb' .
  2. Fungsi 'SQLTable', fungsi ini untuk mendefinisikan perintah SQL 'Select' yang biasanya digunakan untuk memilih atau menyeleksi data. Fungsi ini mengembalikan nilai bertipe DataTable, sehingga dapat mudah dikoneksikan dengan kontrol-kontrol.
  3. Fungsi 'ExecSQL', fungsi digunakan untuk mengeksekusi perintah SQL 'Insert'(menambahkan), 'Update'(memperbarui), dan 'Delete'(menghapus). Fungsi ini mengembalikan nilai bertipe Boolean, dimana jika perintah SQL berhasil dilakukan maka bernilai True, tapi bila gagal akan bernilai False.

Contoh penggunaannya :
  • Mengisi DataGrid.
    DataGridView1.DataSource = SQLTable("select * from tblOrang")
  • Mengisi ComboBox atau ListBox dengan Field tertentu.
    Dim DR As DataRow
    For Each DR In SQLTable("select Nama from tblOrang").Rows
    ComboBox1.Items.Add(DR("Nama"))
    Next
  • Mengisi beberapa TextBox.
    Dim DR As DataRow
    DR = SQLTable("select * from tblOrang").Rows(0)
    TextBox1.Text = DR("Nama")
    TextBox2.Text = DR("Alamat")
  • Mengekekusi perintah 'Insert' untuk menambahkan data.
    ExecSQL("insert into tblOrang (ID, Nama, Alamat) values ('17','Joko','Lamongan')")

Label Berjalan vb.net

Kode ini akan menjalankan / menggerakkan kontrol Label secara horisontal (dari kanan ke kiri) dan vertikal (dari bawah ke atas). Buat Form baru dengan sebuah Label dan sebuah Timer (Enabled=True; Interval=20).


[ VB .NET ]
Untuk menggerakkan secara horisontal, ketikkan kode berikut di bagian 'Timer1_Tick'.
Label1.Left = Label1.Left - 2
If (Label1.Left <= -(Label1.Width)) Or (Label1.Left >= Me.ClientRectangle.Width) Then Label1.Left = Me.ClientRectangle.Width
Sedangkan secara vertikal, ketikkan kode berikut di bagian 'Timer1_Tick'.
Label1.Top = Label1.Top - 2
If (Label1.Top <= -(Label1.Height)) Or (Label1.Top >= Me.ClientRectangle.Height) Then Label1.Top = Me.ClientRectangle.Height

Text Berjalan di Desktop


Text Berjalan di Desktop

Berikut ini contoh dasar untuk membuat Text yang berjalan di Desktop komputer. Source code ini merupakan pengembangan dari aplikasi desktop sebelumnya.

membuat Splash Screen vb.net


Splash Screen

Splash Screen merupakan suatu istilah bagi Form hiasan yang ditampilkan sebelum Form utama ditampilkan. Proses pembuatannya sangat mudah, berikut caranya :
  • Buat Project baru dengan dua buah Form didalamnya (Form1 dan Form2). Dalam hal ini Form1 dianggap sebagai Form splash screen-nya, dan Form2 sebagai Form utamanya.

  • Atur properti dari Form1, yaitu :
    [ VB 6.0 ] / [ VB .NET ]
    BorderStyle / FormBorderStyle = None
    StartUpPosition / StartPosition = CenterScreen
    ShowInTaskbar = False

  • Untuk mempercantik tampilan, tambahkan gambar dan informasi aplikasi ke dalam Form1 seperti gambar diatas.

  • [ VB 6.0 ]
    Lalu didalam Form1 masukkan sebuah kontrol Timer(properti Enabled=True; Interval=2000), dan ketikkan kode ini di bagian 'Timer1_Timer'
    Form2.Show 'memunculkan form utama
    Unload Me 'menutup form splash


    [ VB .NET ]
    Buka jendela Properties dari Project (klik menu Project > NamaProject Properties).
    Atur nilai "Startup Form" menjadi Form2, dan "Splash Screen" menjadi Form1.


    Sekarang untuk mengatur ulang waktu lamanya, di jendela "Solution Explorer" klik tombol "Show All Files" lalu cari dan buka file Application.Designer.vb.


    Lalu gantikan kode (area paling bawah) yang tadinya seperti ini :
    Protected Overrides Sub OnCreateSplashScreen()
        Me.SplashScreen = Global.WindowsApplication1.Form1
    End Sub
    Menjadi seperti ini :
    Protected Overrides Sub OnCreateSplashScreen()
        Me.MinimumSplashScreenDisplayTime = 3000 '3 detik
        Me.SplashScreen = Global.WindowsApplication1.Form1
    End Sub

16 Januari 2012

Download Angry Birds Game Rio Theme for Windows 7


The next version of Angry Birds in the form of Angry Birds Rio which has upgraded features and new episodes than the older version. Note that the earlier version was released by Google. This game was also made available for iPods, iPads, and various mobile platforms and also has online support by navigators like chrome. This particular version has specialized features for different types of users.
The Angry Birds gamer need to clear several stages in which he can destroy the forts, houses and mirror boxes of pigs in order to regain the eggs from those cruel pigs. These Birds use a sling shot to attack the pigs. The user drag the sling shot to desired direction by their fingers in touch screens whereas they use mouse click and drag in Computer.
Free Download Angry Birds Game Rio Theme for Windows 7

Angry Birds Rio Theme

Angry Birds Rio game is an interesting and intense time passer. This game becomes more interesting and more challenging in the later part of the game. Many people get addicted to it but don’t get to play this game often. If you are one of them your problem is solved and this product is for you. You can get the Angry Bird’s environment to your own desktop.
Yes, windows theme of Angry Birds Rio is now available in the market that too for free. This theme has numerous desktop backgrounds of Angry Birds incorporated with it and Birdie cursor styles. The theme transforms even the icons in the desktop and start menu.
There are many types of Birds available with distinct and special powers which can be used to kill the cruel pigs. On a click during a Bird’s flight, a yellow Bird gains an acceleration and attacks with higher speed and bulldozes the pigs with more power, a black Bird blasts itself and clears things in its scope, a smaller Bird splits into three and attack a wider area, the egg laying Bird while flying, lays eggs to clear enemies on ground and a blue Bird comes back to the sling shot after attacking the enemies.

There are many episodes, periods and sub stages available in the game. Themes are available separately for various episodes like Rio themes and standard season themes.
Angry Birds Rio theme for windows operating system is officially released and can be downloaded free from the following link.
Download link for Windows 7 32-bit

Free Download Angry Birds Game Rio Theme for Windows 7 32Bit

Download link for Windows 7 64-bit

Free Download Angry Birds Game Rio Theme for Windows 7 64Bit

More Recommended Extras from the Angry Birds Game world:

While you can also take a look on our various Angry Birds Game at

Free Download Angry Birds Game

We also offer you some of the best Video Walkthroughs of all the levels of Angry Birds which can be seen at

Free Download Angry Birds Walkthroughs

To color and decorate your Personalize Computer, PC, Laptop, or any Gadget, then for those things also we brings you the best collection of Themes at

Free Download Angry Birds Themes

At some point of time, you might also be stuck up with some levels, for such cases we also offer you some of the best cheats in completing all levels from the Angry Birds Game at

Free Download Angry Birds Cheats


11 Januari 2012

Membuat Storeprocedure Select, Insert, Delete, dan Update pada Microsoft SQL Server 2005


Mari coba kita buat store procedure dari tabel barang yang terdapat pada database produk yang sudah dibuat sebelumnya. Langkah-langkahnya adalah sebagai berikut : 
1. Store Procedure dapat ditemukan di produk -> Programmability -> Stored Procedures. Untuk membuat store procedure baru dilakukan dengan klik kanan pada Stored Procedures, kemudian klik New Store Procedure. Dapat dilihat pada gambar di bawah ini :
2. Untuk membuat store procedure select, maka ketikkan
CREATE PROCEDURE stpBarangSelectAll 
AS SELECT * FROM barang

3. Kemudian klik Execute atau tekan F5. Jika berhasil maka akan keluar pesan 
Command(s) completed successfully.
4. Refresh store procedure, maka store procedure dengan namastpBarangSelectAll akan muncul
5. Ulangi langkah 1 sampai 4 untuk membuat store procedure yang lain kecuali perintah pada langkah 2 dapat diisi dengan :
Untuk Insert dapat diketikkan syntax :
CREATE PROCEDURE stpBarangInsert @id_barang varchar(5), @nama varchar(50),@stok int, @ket varchar(5) AS INSERT INTO barang VALUES(@id_barang,@nama,@stok,@ket)

Untuk Delete dapat diketikkan syntax :
CREATE PROCEDURE stpBarangDelete @id_barang varchar(5) AS DELETE FROM barang where id_barang=@id_barang

Untuk Update dapat diketikkan syntax :
CREATE PROCEDURE stpBarangUpdate @id_barang varchar(5), @nama varchar(50),@stok int, @ket varchar(5) AS UPDATE barang SET nama=@nama,stok=@stok,ket=@ket WHERE id_barang=@id_barang
6. Setelah dibuat semua store procedure jangan lupa untuk refresh store procedure agar store procedure yang kita buat muncul. Hasilnya dapat dilihat pada gambar berikut.

Selamat mencoba. Moga success.

Selanjutnya kita akan coba bikin Web Service dari store procedure yang udah kita buat, berikut cara koneksi melalui web service yang diletakkan pada web config. Insya Allah.... 

10 Januari 2012

Program Visual Basic: Membuat No. Faktur Otomatis atau No. Order Otomatis atau Penomberan Otamatis


Sekarang kita akan membuat program membuat No Faktur atau Penomberan secara otomatis, sangat berguna pada saat kita menginputkan sebuah data. Dengan adanya penomberan otomatis maka kecil kemungkinan kita akan salah menginputkan sebuah penomberan karena akan otamatis melakukan sebuah penambahan.

Kita Menggunakan Project Yang sudah pernah kita buat di Tutor Cara Koneksi Visual Basic dengan Database SQL

Buat Project seperti di bawah ini:

Sekarang kita mulai Pengcodingan:
1. Untuk generalisasi
Public cn As ADODB.Connection
Dim rsTblMhs As ADODB.Recordset
Dim rs As ADODB.Recordset
Dim strsql As String


2. Buat Sub Koneksi untuk mengkoneksikan database dengan visual basic
Public Sub koneksi()
Set cn = New ADODB.Connection
'cn.Open "FILE NAME=koneksi_TblMhs.udl"
'untuk nampilin tabel di sql tadi,buka koneksi_TblMhs.udl dg notepad trus copy deh kesini
cn.Open "Provider=SQLOLEDB.1;Password=123456;Persist Security Info=True;User ID=sa;Initial Catalog=DatabaseMhs;Data Source=TOSHIBA-PC"
End Sub


3. Buat Sub Kode_Otomatis
Private Sub kode_otomatis()
Set rs = New ADODB.Recordset
strsql = "Select max(NIM)as NIM from TblMhs"
rs.CursorLocation = adUseClient
rs.Open strsql, cn, adOpenDynamic, adLockOptimistic

If Not rs!NIM = "" Then
KODE = Mid(rs!NIM, 6, 9)
NoUrut = CLng(KODE)
NoUrut = NoUrut + 1
TxtNIM.Text = "080010" + Format(NoUrut, "000")
Else
NoUrut = 1
TxtNIM.Text = "080010" + Format(NoUrut, "000")
End If
End Sub

Sub Kode_otomatis di panggil di tombol New.
If Not rs!NIM = "" Then
KODE = Mid(rs!NIM, 6, 9)
NoUrut = CLng(KODE) -> merubah menjadi char long
NoUrut = NoUrut + 1
TxtNIM.Text = "080010" + Format(NoUrut, "000")
jika tabel tidak kosong maka, maka tambahkan no urut (angka yang paling tinggi) + 1 dari nilai string 6, dan penambahan di string 9 sebanyak 1

Else
NoUrut = 1
TxtNIM.Text = "080010" + Format(NoUrut, "000")
jika tidak maka penambahan langsung 1

4. Cmd New
Private Sub CmdNew_Click()
CmdAdd.Enabled = True
CmdNew.Enabled = False
TxtNIM.Locked = False
txtNama.Locked = False
TxtAlamat.Locked = False
kode_otomatis
End Sub

Penomberan kode otomatis di panggil di sini, jadi setiap kali user mengklik tombol new maka NIM akan langsung otomatis terisi secara berurutan.

5.Form Load

Private Sub Form_Load()
TxtNIM.Text = ""
txtNama.Text = ""
TxtAlamat.Text = ""

koneksi

Set rsTblMhs = New ADODB.Recordset
rsTblMhs.CursorLocation = adUseClient
strsql = "select*from TblMhs"
rsTblMhs.Open strsql, cn, adOpenDynamic, adLockOptimistic
Set DataGrid1.DataSource = rsTblMhs

CmdAdd.Enabled = False
CmdUpdate.Enabled = True
CmdEdit.Enabled = True

CmdDelete.Enabled = True
TxtNIM.Locked = True
txtNama.Locked = True
TxtAlamat.Locked = True
End Sub

Koneksi di taruh disini, jadi setiap di load database langsung terkoneksi di visual basic.

6. Sub CmdAdd
Private Sub CmdAdd_Click()
If TxtNIM.Text = "" Then
MsgBox "NIM belum diisi", vbInformation, "PESAN"
TxtNIM.SetFocus
ElseIf txtNama.Text = "" Then
MsgBox "NAMA belum diisi", vbInformation, "PESAN"
txtNama.SetFocus
ElseIf TxtAlamat.Text = "" Then
MsgBox "ALAMAT belum diisi", vbInformation, "PESAN"
TxtAlamat.SetFocus
Else
rsTblMhs.AddNew
rsTblMhs("NIM") = TxtNIM.Text
rsTblMhs("NAMA") = txtNama.Text
rsTblMhs("ALAMAT") = TxtAlamat.Text
rsTblMhs.Update
End If
Set DataGrid1.DataSource = rsTblMhs
TxtNIM.Text = ""
txtNama.Text = ""
TxtAlamat.Text = ""
CmdAdd.Enabled = False
CmdUpdate.Enabled = True
CmdNew.Enabled = True
CmdDelete.Enabled = True
End Sub

menambahkan data ke database

7.Sub CmdDelete
Private Sub CmdDelete_Click()
TxtNIM.Locked = False
txtNama.Locked = False
TxtAlamat.Locked = False
TxtNIM.Text = rsTblMhs("NIM")
txtNama.Text = rsTblMhs("NAMA")
TxtAlamat.Text = rsTblMhs("ALAMAT")
If MsgBox("apakah yakin ingin dihapus?", vbYesNo, "KONFIRMASI") = vbYes Then
Set rsTblMhs = cn.Execute("Delete from TblMhs where NIM='" & TxtNIM.Text & " ' ")
MsgBox "Data telah dihapus", vbInformation, "PESAN"
End If
'untuk me-refresh datagrid setelah delete data
If cn.State = adStateOpen Then
setrsTblMhs = New ADODB.Recordset
rsTblMhs.CursorLocation = adUseClient
strsql = "select * from TblMhs"
rsTblMhs.CursorLocation = adUseClient
rsTblMhs.Open strsql, cn, adOpenDynamic, adLockOptimistic
Set DataGrid1.DataSource = rsTblMhs
End If
End Sub

Menghapus database

8.Cmd Refresh

Private Sub Refresh_Click()
Set DataGrid1.DataSource = Nothing
DataGrid1.Refresh
End Sub

Mengosongkan datagrid, tapi data masih tersimpan di database

Untuk Program lengkapnya bisa di download di sini


Selamat Mencoba


refernce : http://allaboutalgoritma.blogspot.com

06 Januari 2012

How To Add Facebook Like/Fan Box To Blogger


Facebook is everywhere. As a blogger, we know how much its necessary to make our presence in Facebook and it is believed one of the effective tool to gain more quality traffic.So here in this post I am going to teach you how to add Facebook fan box or like box to your blogger blogs. The installation is pretty simple using Blogger gadgets and I hope to bring a customized blogger gadget in my future post.

The installation includes two steps
Step 1: Login to your blogger account and click on the button


Step 2: After hitting the button, click on Edit Content and replace the default Facebook ID 163941377964 with your Facebook page ID and click on Add Widget.
add facebook like box to blogger
Now you can see the Facebook like box on your blog’s sidebar.

Hacking Class 3 - Footprinting Continues


Yesterday I have explained You all that How to collect information about the Websites and organisations....
Today i will continue With Footprinting and take you to some more deep level... And then tell you how to make Blueprints from them.. So read on....

UNEARTHING BASIC INFORMATION

First of all We will focus on Unearthing the Basic Information about the site... i.e the IP and server informations..
I will Show you with the help on snapshots :
First go to START --> RUN --->type cmd--->then type tracert www.websitename.com
Here we will use two basic commands in command Prompt(cmd): tracert  www.webistetobeanlysed.com

and ping www.websitename.com

It will look something like this:

Hacking Class 3 - Footprinting Continues

Here I explain what it shows...
We trace routed www.amulive.com
1. Shows Our Gateway of connectivity.
2. Shows our Outgoing Footprint Ip(i.e the our IP that is being analyzed by website)
3. Shows Connectivity passes through which service Provider. I uses BSNL but its showing airtel because I prefer DNS of Airtel for surfing Quick).
Next steps showing the Ip's of Webservers through which amulive is being maintained.

After This We will came to now the IP of the Website and Ip of itz webservers which are being used further.
website Ip can be used to gather more information about the website..

How to Find The Personal Information About the Individual Over Net ??
Its one of the Most important task. Its also helpful in finding the fake profiles... But unfortuantely this is limited But we can use it to the Most... There are two website which will help us...
1.  http://people.yahoo.com ( best Site To trace People for their Personal Information and also reverse Phone or mobile number Look up)

Hacking Class 3 - Footprinting Continues


2.  http://www.intellius.com  ( But this site is limited to US only)

Hacking Class 3 - Footprinting Continues

Sample Report from Intellius :
Hacking Class 3 - Footprinting Continues
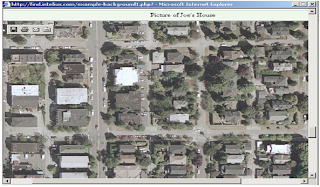
Satellite Picture of Joe's House from Intellius:
Hacking Class 3 - Footprinting Continues

Now Using these Sites you will be able to collect the personal information of theindividuals and also being able to identify the fake profiles..


TOOLS NEEDED FOR FOOTPRINTING :

You can avoid above hectic work by using this tool : SpiderFoot
Download linkhttp://www.binarypool.com/spiderfoot/

Information about SpiderFoot:


SpiderFoot is a free, open-source, domain footprinting tool. Given one or multiple domain names (and when I say domains, I'm referring to the DNS kind, not Windowsdomains), it will scrape the websites on that domain, as well as search Google, Netcraft, Whois and DNS to build up information like:
  • Subdomains
  • Affiliates
  • Web server versions
  • Users (i.e. /~user)
  • Similar domains
  • Email addresses
  • Netblocks


ADDITIONAL FOOTPRINTING TOOLS :

Note all these tools are freewares .. U can easily google then and download these..


~ Whois
~ Nslookup
~ ARIN
~ Neo Trace
~ VisualRoute Trace
~ SmartWhois
~ eMailTrackerPro
~ Website watcher
Google Earth
GEO Spider
~ HTTrack Web Copier
~ E-mail Spider


This is all about Footprinting .  Now Use the Gathered information to make basic Detailed Information about the Website/person...

I thinks This is Enough for Today. Please Comment . If you have any queries Post them in form of comments.